
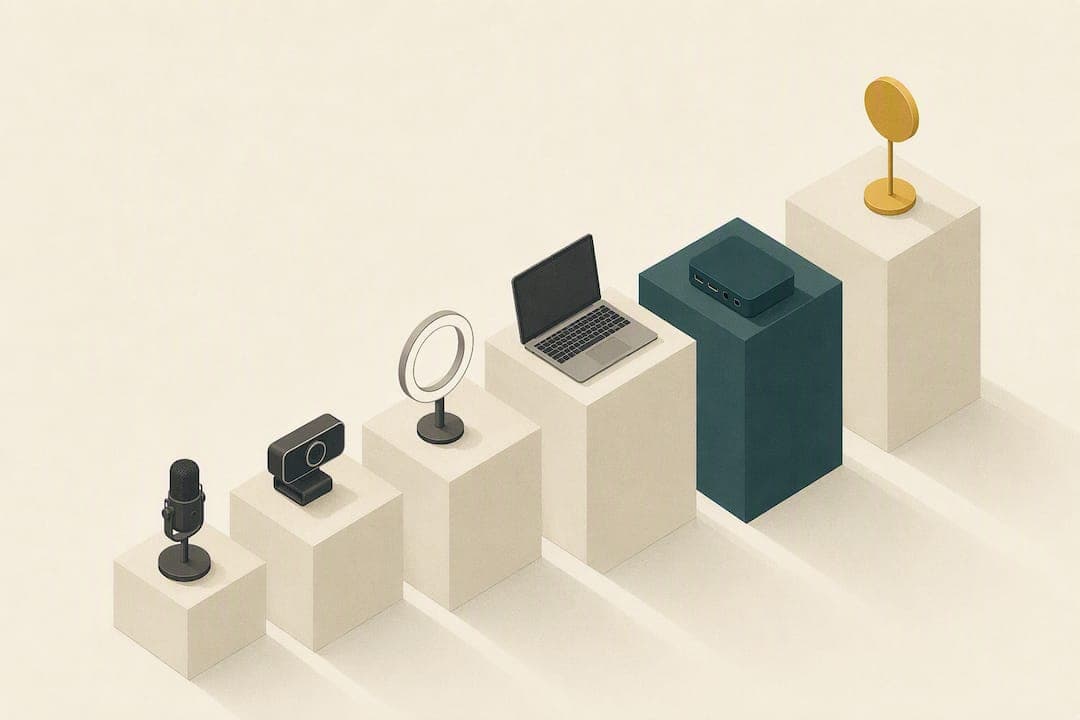
Your minimum reliable setup is six items: a dedicated microphone, a 1080p webcam or phone camera, one soft light, wired internet with a hotspot backup, presentation slides, and a webinar host account. If you fix nothing else, fix audio. A dedicated mic and real monitoring determine whether people stay on the call, far more than any camera upgrade will. This checklist scales from a $150 starter rig to a production setup, so build in that order.
TL;DR:
- A high-quality microphone is the most crucial equipment, with a USB dynamic mic preferred for home offices due to better room noise handling.
- A dedicated 1080p webcam or smartphone app like Continuity Camera significantly improves video quality over built-in laptop cameras.
- Running a full rehearsal on the actual webinar platform 60 to 120 minutes prior minimizes technical issues and ensures smooth live operation.
- A wired internet connection with at least 3 to 5 Mbps upload speed and backup options like a charged phone hotspot are essential for reliable streaming.
- Proper lighting, including a soft key light and optional reflectors or diffusers, eliminates harsh shadows and enhances on-camera appearance.
Table of Contents
- The Complete Webinar Equipment Checklist, Category by Category
- Starter, Mid, and Pro Kits: Build in the Right Order
- Your Pre-Live Dry-Run Checklist
- Connection Speed and Backup Plans That Actually Work
- Lighting and Room Setup Without a Studio Budget
- Choosing Your Webinar Platform vs. Your Presentation Tools
- Optional Gear Worth Considering Later
- Audio Interfaces and Mixers: When You Need More Control
- Backup Equipment and Redundancy: Planning for Failure
- Lighting Accessories: Diffusers and Reflectors
- Cable Management and Setup Ergonomics
- Power Supply and Surge Protection
- Author perspective: checklist priorities and common mistakes to avoid
- A Turnkey Webinar System Built for Financial Advisors
- Sources
- FAQ
The Complete Webinar Equipment Checklist, Category by Category
Most hosts buy in the wrong order. They chase a nicer camera before fixing a mic that sounds like it's underwater. Work through these categories in sequence, because each one solves a different failure point.
Audio first, always. A USB dynamic microphone, such as a Shure MV7 or similar, generally handles room noise better than a condenser mic, which picks up every fan, dog bark, and keyboard click in a untreated room. Condensers sound richer in a quiet, treated space, but most home offices aren't that space. If you're already running a mixer or audio interface, an XLR mic gives you more control. Whatever you choose, monitor yourself through a headset or closed back headphones during the session. You cannot hear your own echo or clipping without them, and by the time an attendee messages you about it, half your audience has already tuned out. Get comfortable with your mute and unmute shortcut before you ever go live, add a $10 pop filter, and keep the mic four to six inches from your mouth, slightly off to the side.
Video comes second. An external 1080p webcam beats a built in laptop camera almost every time, mostly because of low light performance. If you're on a Mac and an iPhone, Continuity Camera turns your phone into a sharper webcam for free. On other platforms, apps like Camo do something similar. Frame yourself from mid chest up, keep your eyes roughly level with the top third of the frame, and clear the visible background of anything distracting.
Lighting fixes what the camera can't. One soft light at eye level, three to four feet away, removes the harsh shadows that make even a good camera look amateur. Ring lights are fine for a straight-on talking head; a small softbox gives more flattering, directional light if you're presenting alongside slides.
Connection reliability is non-negotiable. Run a wired Ethernet cable whenever possible, and know your upload speed before you commit to HD streaming. Have a phone hotspot charged and ready as backup.
Your computer needs to be reasonably recent, and you should close every background app before going live. Free up CPU and bandwidth, don't let the machine multitask during your webinar.
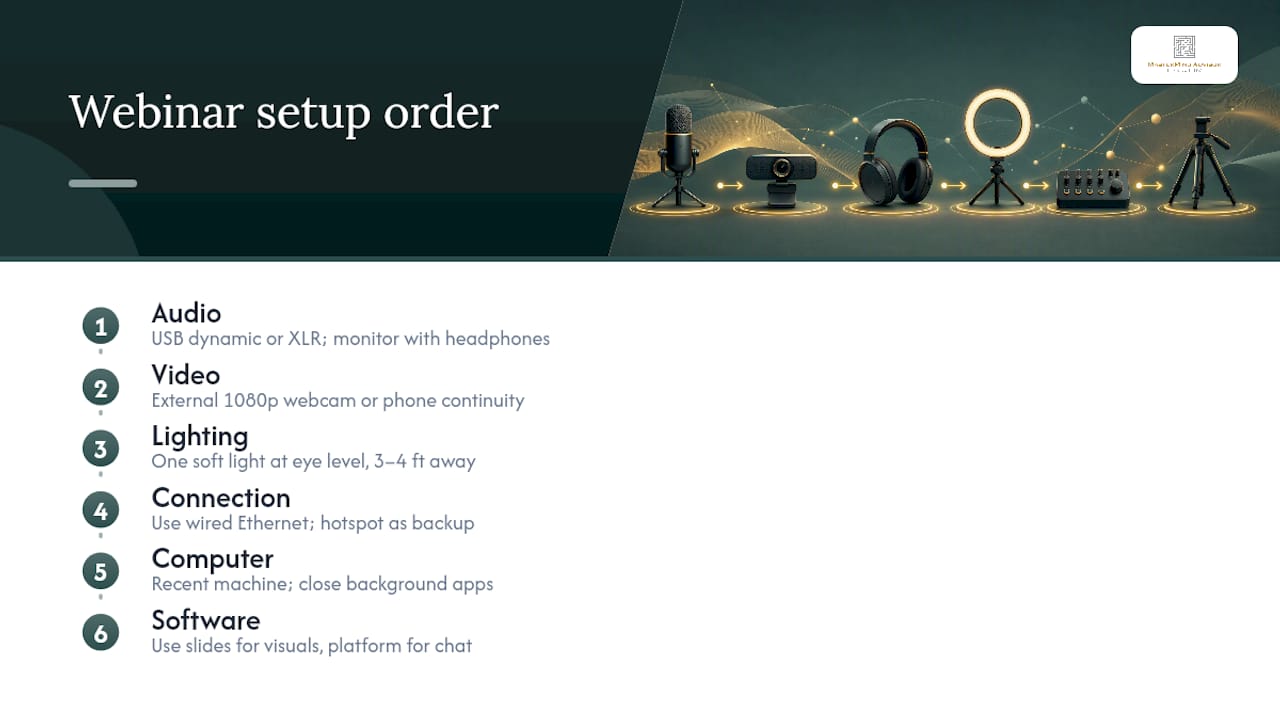
Split your software. Slide software (PowerPoint, Google Slides) handles your visuals. Your webinar platform handles registration, chat, polls, and recording. They are not the same job, and trying to force one tool to do both usually backfires.
Starter, Mid, and Pro Kits: Build in the Right Order
You don't need studio gear to run a credible webinar. You need the right gear at the right stage, and a clear sense of when to move up. A six-item kit — camera, mic, light, wired internet, backdrop, and software — covers most of what a new host needs before anything else matters.
- Starter kit ($150 to $300 total): a USB microphone in the $50 to $130 range, a 1080p webcam or a recent smartphone, a basic ring light, a plain Ethernet cable, and a simple headset for monitoring. This setup runs a clean, professional-sounding webinar for a fraction of what most people assume they need to spend.
- Mid kit: a dynamic USB mic or an entry-level XLR mic paired with a small audio interface, an upgraded webcam or a Cam Link feeding a mirrorless camera, a softbox or LED panel light, and a UPS to keep your modem alive during short power blips. This tier suits someone running webinars regularly enough that a hiccup actually costs them leads.
- Pro kit: a broadcast-grade XLR microphone, a mirrorless camera with a dedicated capture card, a hardware switcher like an ATEM Mini for multi-camera control, basic acoustic treatment on the walls, and a Stream Deck for one-touch scene changes. This is production-level gear for hosts running frequent, high-stakes events.
The upgrade order matters more than the budget. Fix audio and your room's acoustics before you touch the camera, and only invest in switching hardware once you're actually running multiple cameras or recording sessions worth reusing. Buying an ATEM Mini before your mic sounds clean is spending money in the wrong place.
Your Pre-Live Dry-Run Checklist
Skipping the rehearsal is the single most common reason webinars fall apart in real time. Platform-specific dry runs materially reduce technical failures, and they only work if you run them on the exact platform you'll use live, not a generic video call. Different platforms compress audio and video differently, and a test on Zoom tells you very little about how you'll sound on a dedicated webinar tool.
Sixty to 120 minutes before you go live:
- Run a full rehearsal on the actual webinar platform, with your co-host joined and recording turned on.
- Record a 30-second audio sample and listen back for echo, hum, or room noise.
- Confirm mute and unmute controls, and check chat and Q&A permissions for attendees.
- Test screen share, click through every slide transition, and fire a test poll.
- Drop your CTA link into chat and click it yourself to confirm it works.
Ten to 15 minutes before:
- Disable cloud sync (Dropbox, OneDrive) and pause any pending software updates.
- Close every app you don't need open, and check your UPS or laptop battery level.
Pro Tip: Set a recurring calendar reminder for the dry run itself, not just the webinar. Hosts who skip rehearsal almost always skip it because they ran out of time, not because they forgot it mattered.
In the final 60 to 30 seconds, just confirm your join link is open and ready to click.
Connection Speed and Backup Plans That Actually Work
Aim for 3 to 5 Mbps upload for standard definition, and 5 to 10 Mbps for HD. Test your actual upload speed at your webinar location, at the same time of day you'll be live, because a speed test at 9 a.m. tells you nothing about your connection at 2 p.m. when the whole household is streaming.
One stat worth knowing: the newer IEC 63478-3:2026 standard for conferencing quality doesn't just measure raw bandwidth. It weighs jitter, packet loss, and bandwidth together with how clear the call actually feels to a real listener. That's worth knowing because a "fast" connection with high jitter can still sound choppy, even if your speed test looks fine on paper.
Wire your laptop to your router with a Cat6 cable and turn off Wi-Fi auto-fallback, so your machine doesn't silently drop to a weaker signal mid-session. For backup, keep a phone hotspot on a different carrier than your home internet charged and within reach, and if you can, put your router and modem on a small UPS. If you co-host, have that person join from a completely separate network, so one household outage doesn't take down the entire event. If your connection does start to fail live, drop your video bitrate or pause screen sharing first. Audio survives on far less bandwidth than video does.
Lighting and Room Setup Without a Studio Budget
You don't need a studio. You need one good light and a background that doesn't distract. Place a single soft key light three to four feet from your face, angled slightly above eye level. A north-facing window works as your primary light source if you have one, since it gives you soft, even light without the harsh angle of direct sun.
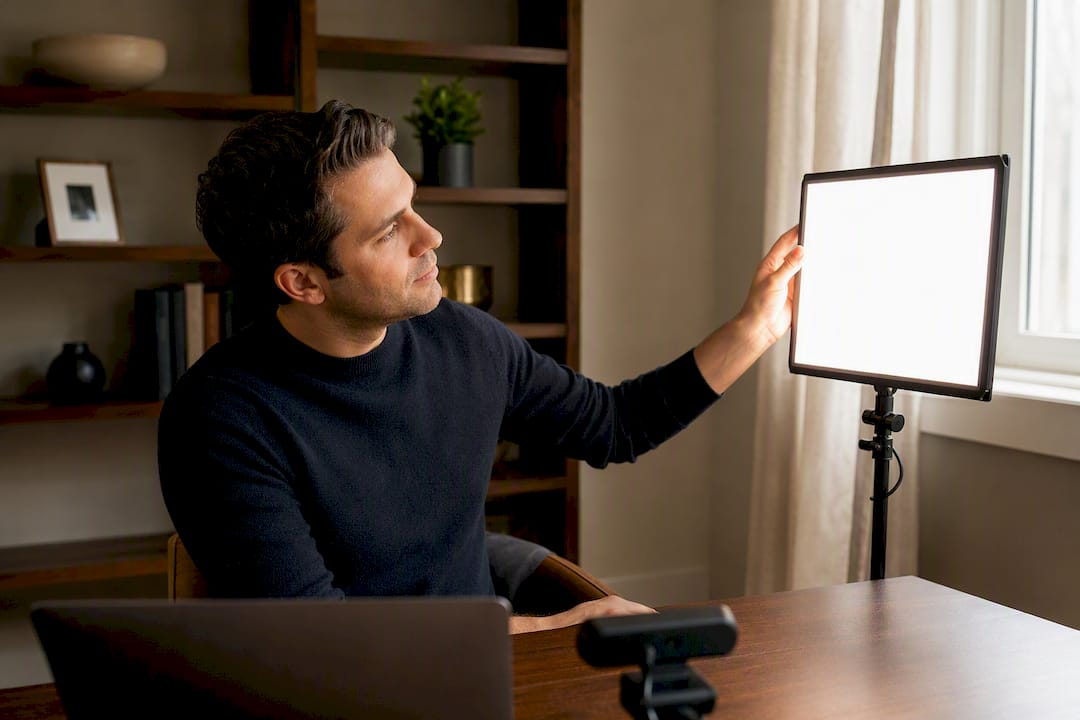
Skip the virtual background unless you own an actual green screen. Software-based backgrounds tend to ghost around your hair and shoulders the moment you move, which looks worse than no effect at all. A styled corner of a real room, a bookshelf, a plant, some depth behind you, reads as more professional than a blurred or cropped digital backdrop.
A few cheap acoustic fixes go a long way: a rug on a hard floor cuts echo, one foam panel behind your camera softens reflections, and moving your setup away from windows or glass reduces the tinny bounce that makes a room sound hollow on recording.
Pro Tip: Test your lighting with your glasses on, if you wear them. Ring lights placed too close create a visible glare ring that a softbox angled slightly off-center avoids entirely.
Don't over-light the shot. A soft, well-placed light does more for how clear you look on camera than any resolution bump ever will.
Choosing Your Webinar Platform vs. Your Presentation Tools
These are two different jobs, and conflating them is where a lot of setups go wrong. Slide software, PowerPoint or Google Slides, handles what your audience sees. Your webinar platform handles registration, live chat, polls, Q&A, and recording. Neither one replaces the other.
When you're evaluating a webinar platform, check for:
- Recording quality and how long replays stay accessible to registrants.
- Attendee limits that match your actual list size, not just your current one.
- Built-in polls and a Q&A queue you can moderate without losing your place.
- Integrations with your email tool or CRM, so registrants flow into follow-up automatically.
- How replays get delivered, automatically or manually, and whether that's editable.
Most hosts never need OBS, an ATEM switcher, or a Stream Deck. Those tools earn their place once you're running multiple cameras, switching between scenes live, or building picture-in-picture layouts for a more produced feel. If you're presenting solo with slides and a webcam, skip that layer entirely until your format actually demands it.
Optional Gear Worth Considering Later
None of this is required to run a solid webinar, but each item solves a specific, real problem once you're doing this often enough to notice it.
- A teleprompter app or second-screen prompter keeps your eye line on the camera instead of your notes, which reads as far more confident to attendees.
- A capture card or Cam Link lets you feed a DSLR or mirrorless camera into your computer, worth it once you're recording evergreen content you'll reuse for months.
- A Stream Deck or hardware switcher gives you one-touch control over scenes and overlays during live production.
- A UPS keeps your modem and laptop running through short power outages, cheap insurance for a live event.
- Acoustic treatment only pays off once you're recording assets you'll replay repeatedly. Small room flaws get amplified every time someone rewatches.
Audio Interfaces and Mixers: When You Need More Control
A USB microphone plugs straight into your laptop and works fine for most solo webinars. An audio interface or small mixer becomes worth it the moment you add a second mic, a co-host, or an XLR microphone that needs phantom power.
An entry-level two-channel interface (Focusrite Scarlett and similar units are common choices) gives you a gain knob for your mic level, a headphone jack for real-time monitoring, and enough clean signal to avoid the digital hiss cheap USB mics sometimes pick up. A small mixer goes further: multiple mic inputs, independent volume control per channel, and often a built-in compressor that smooths out volume spikes when you get excited mid-sentence.
You don't need this tier to sound professional. A quality USB mic in a quiet room beats an interface paired with a bad mic every time. But if you're running panel discussions with multiple speakers, or you want independent control over your voice versus a co-host's, an interface stops you from having to compromise on one shared input. It also lets you add basic EQ, cutting muddy low frequencies or taming a sibilant "s" sound, without touching software plugins that eat CPU during a live stream.
Backup Equipment and Redundancy: Planning for Failure
Assume something will fail eventually, and plan for it rather than hoping it won't. The cheapest insurance is a second device logged into the platform as backup host, ideally on a different network entirely. If your laptop crashes or your Wi-Fi drops, someone can keep the room running while you reconnect.
Keep a phone hotspot charged and ready, on a carrier different from your primary internet provider, so a local outage doesn't take out both connections at once. A small UPS on your router and modem buys you 20 to 30 minutes of runtime during a power blip, enough to finish most webinars without anyone noticing.
For hardware, a spare USB mic or even a decent pair of wired earbuds with a mic can save a session if your primary microphone fails mid-call. Keep backup slides saved locally and in the cloud, not just open in one browser tab, in case your presentation software crashes. None of this needs to be expensive. It needs to exist before you need it.
Lighting Accessories: Diffusers and Reflectors
Once you've got a single soft light working, diffusers and reflectors are the cheap next step for improving how that light actually looks on camera. A diffuser, often just a translucent panel or dome over your light source, softens harsh direct light into something more even, which reduces the shadows under your eyes and nose that a bare bulb creates.
Reflectors do the opposite job: they bounce existing light back onto your face to fill in shadows without adding a second light source. A simple white foam board propped just out of frame, angled toward your face, works as well as a purchased reflector kit for most home setups. If you're relying on a window as your key light, a reflector on the opposite side balances out the shadow that window light naturally creates on one side of your face.
Neither of these costs much. A collapsible reflector runs under $30, and a diffuser dome for a ring light often comes bundled with the light itself. They're worth adding once your single light is in place and you notice harsh shadows or a washed-out hotspot on your face, but they're not worth buying before you've solved lighting placement in the first place.
Cable Management and Setup Ergonomics
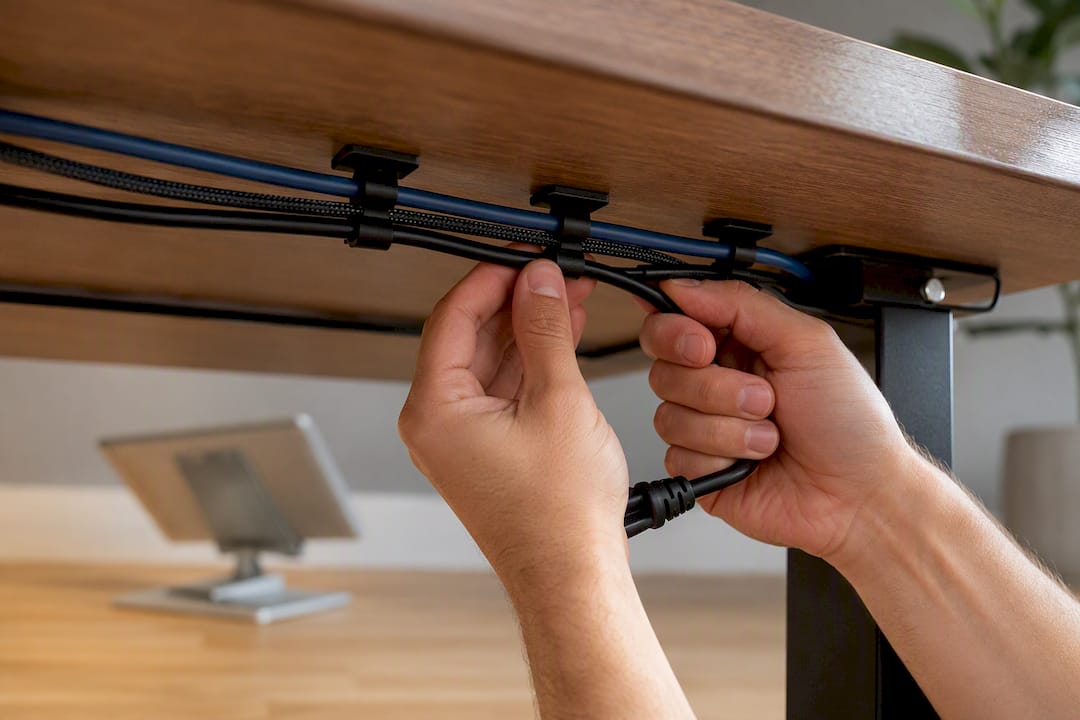
A tangled desk doesn't just look messy on camera. It's also where technical failures hide until the worst possible moment. Route your Ethernet cable, mic cable, and power cords along the back or underside of your desk, secured with adhesive clips or a cable sleeve, so a stray foot doesn't unplug your microphone mid-sentence.
Position your webcam at eye level, not angled up from a laptop sitting flat on the desk. A simple laptop stand or a stack of books solves this instantly and removes the unflattering upward angle that makes most laptop webcam footage look amateur. Your microphone should sit close enough to catch your voice clearly without appearing in frame, typically just below or to the side of your camera's view.
Sit in a chair that supports a 45 to 90 minute session without you shifting constantly, since fidgeting reads as distraction on camera. Keep your most-used items, notes, water, remote controls, within arm's reach so you're not leaning out of frame mid-presentation. None of this requires new gear. It requires five minutes of setup before your first dry run.
Power Supply and Surge Protection
A power flicker mid-webinar can end the session instantly if your router, modem, or laptop lose power at the wrong moment. A basic surge protector strip is the minimum, it protects your gear from spikes, but it does nothing during an actual outage.
A small uninterruptible power supply (UPS) is the real fix. Plug your router, modem, and laptop charger into it, and you typically get 20 to 30 minutes of runtime during a blackout, enough to finish most sessions or at least message attendees before your connection dies completely. Battery capacity varies by unit, so check the specific runtime rating before assuming it'll cover your setup.
If you're running from a laptop, keep it charging throughout the session rather than relying on battery alone, and confirm your charging cable is a reliable one, not the one with a fraying connection you've been meaning to replace. For webinars from a location without guaranteed power backup, a portable battery pack rated for laptop charging adds another layer of insurance for a relatively small cost.
Author perspective: checklist priorities and common mistakes to avoid
Audio and rehearsal are the two levers that actually move outcomes. Everything else is refinement. The mistake I see constantly is a host who buys a $400 camera before fixing a $60 microphone problem, or before running a single dry run on the real platform. Gear doesn't fix a webinar that has no follow-up plan behind it either. A clean setup paired with a structured follow-up sequence is what turns attendees into leads. The equipment gets people to stay on the call. What happens after determines whether it was worth running at all.
— Josh
A Turnkey Webinar System Built for Financial Advisors
Building and testing this checklist yourself takes real time, time most advisors would rather spend with clients than troubleshooting a mic or rehearsing slide transitions. Some marketing providers run the entire webinar production and follow-up process for independent financial advisors, so you're not the one managing audio checks, platform settings, and CRM automations on top of everything else your practice requires.
Some systems handle production, registration, and automated email follow-up as one connected process, tailored to how advisors sell and how compliance requirements shape what you can say, as explained in this marketing automation checklist for SMBs. Instead of assembling a checklist and hoping your CRM catches every registrant, you get a system built to convert attendees into scheduled conversations. If you'd rather focus on your content and your prospects than your microphone placement, see how Mastermind Advisor's webinar system works and check what a done-for-you setup looks like for your practice.
Sources
- 11 webinar tools: the secret to hosting engaging and interactive online events
- What is a bitrate? A guide for webinar producers
- 10 Requirements for a high-converting webinar setup 2026
FAQ
What Is the Single Most Important Piece of Webinar Equipment?
A dedicated microphone matters more than any other item, since audio quality drives attendee retention more than video resolution does.
What Upload Speed Do I Need for a Webinar?
Aim for 3 to 5 Mbps upload for standard definition and 5 to 10 Mbps for HD, tested at your actual location and time of day.
Do I Need a Green Screen for Virtual Backgrounds?
Yes, effectively. Without one, software backgrounds tend to ghost around movement, and a real styled backdrop looks more professional than a cropped digital one.
How Long Before a Webinar Should I Run a Dry Run?
Run a full platform-specific rehearsal 60 to 120 minutes before going live, with final device checks 10 to 15 minutes before start time.
Can Financial Advisors Get Help Setting Up Webinar Production?
Yes. Mastermindadvisormarketing builds and manages the full production and follow-up system for independent financial advisors, handling setup, CRM integration, and automated email sequences.